Necromunda scratch Terrain and GW bits
Height is what the Underhive needs, for all its low down, sump-slicking goodness, there's a whole world of pylons and vertical scariness for bullets to explore. Its a long way down from the high points too!
One of the key things I wanted was stable, and playable height. The massive column thing they made in White Dwarf all those years ago still sticks with me, and loads more people will remember it as well.
My issue is storage. I'm sure the original 'Beast' shown here was a dream to play on and a nightmare to store. I wanted a bit of both. I'm aware that I couldn't take over my garage, but still want to be able to get a decent number of bodies at almost eye level.
Well I can confirm it IS worth doing some height stuff as this has allowed me to get taaaaaall games in

Enter APTAMIL cans. Or giant Pineapple cans, or paint pots, or giant bits of piping (note to self, add!). These beauties are pretty solid, and when combined with a massive amount of PVA, and some grunt, these form a pretty solid base. I tapered the base with some additional bits of thicker polystyrene (and then coated the hell out of it again with PVA).
I cutout a hatch-hole carefully after this to try and make the piece uniform enough.
This then looked tall, and could immediately raise the height of some of the existing bits of scenery, but I wanted to be able to use the damn thing as an actual gaming piece, a centrepiece if I wanted to.
Enter under gravel filters. These things were all over the Necromunda Facebook group and I cannot recommend them enough, for about 7 quid you get some awesome industrial looking surfaces, along with the ability to combine them to form surfaces, or bridges. The hidden bonus to these is that they are pretty light, and therefore can make lengthy enough bridges without collapsing things with their weight.
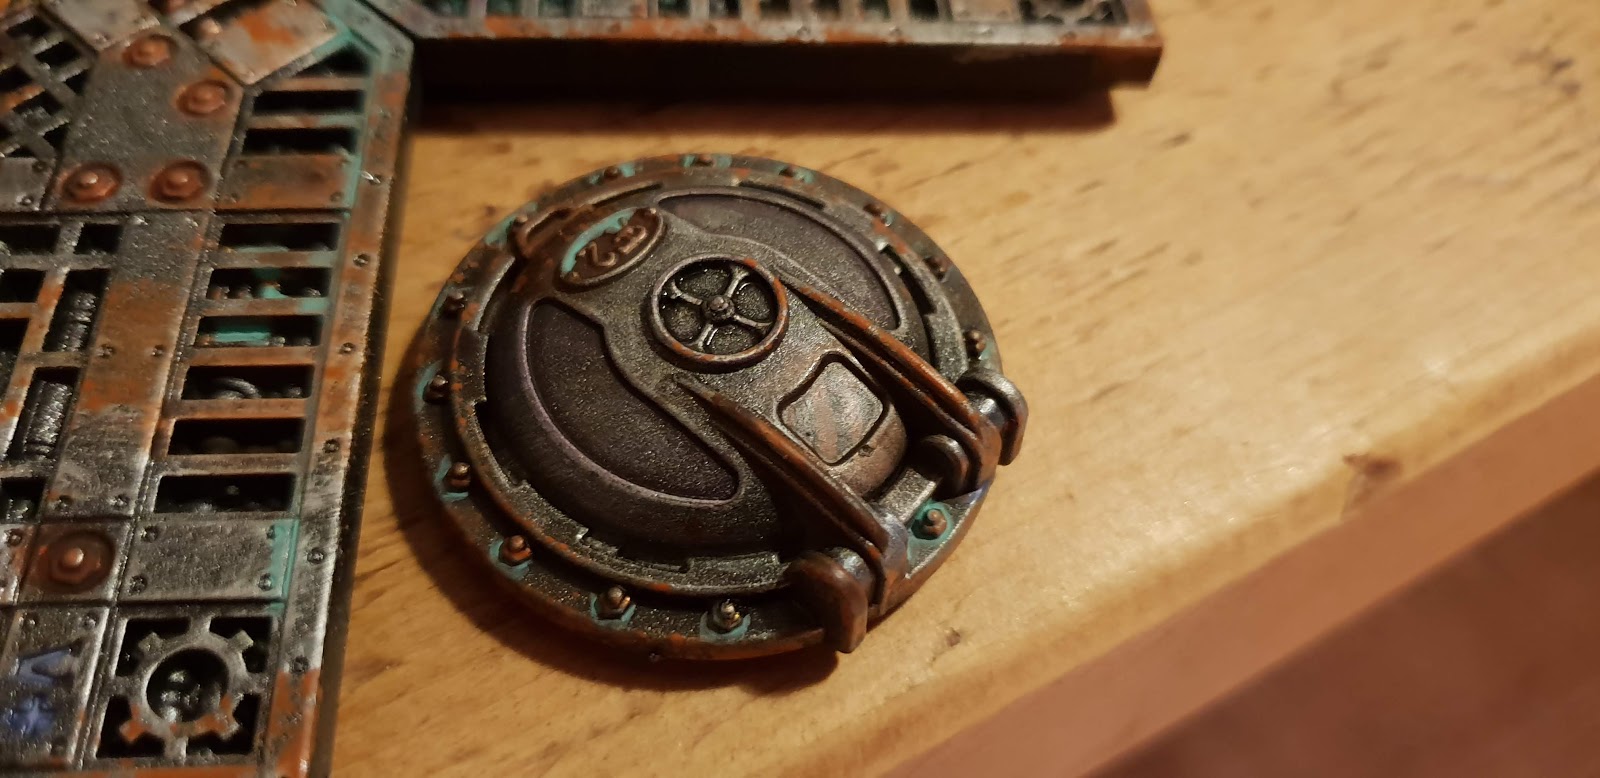
So I shaved a roughly circular shape into one of the panels, and boom, balconette. For stability I also added a brass rod underneath, hidden by some industrial looking tubing.
For rivets I then went to town, i'll put a Tutorial up soon for how I made them and the process I followed.
Because this double pillar piece by itself would appear a bit uncharacteristic, I made pair more of these raised tiles with the aid of 8 separate Azeera Coffee cans that were lying around. when I started I didn't realise that one a pair were shorter than the others. ENTER GRAVEL FILTERS AGAIN.
 These, coupled with some leftover MDF discs raised the height to a uniform level. By gluing (that didn't work) and then screwing in the caps to the underhive tiles, I managed to make them swap-able and the same height as the existing Mortalis tiles from FW.
As legs of the Underhive to fight amongst I wasn't too worried about the quality of the painting as its all about the line of sight.
These, coupled with some leftover MDF discs raised the height to a uniform level. By gluing (that didn't work) and then screwing in the caps to the underhive tiles, I managed to make them swap-able and the same height as the existing Mortalis tiles from FW.
As legs of the Underhive to fight amongst I wasn't too worried about the quality of the painting as its all about the line of sight.
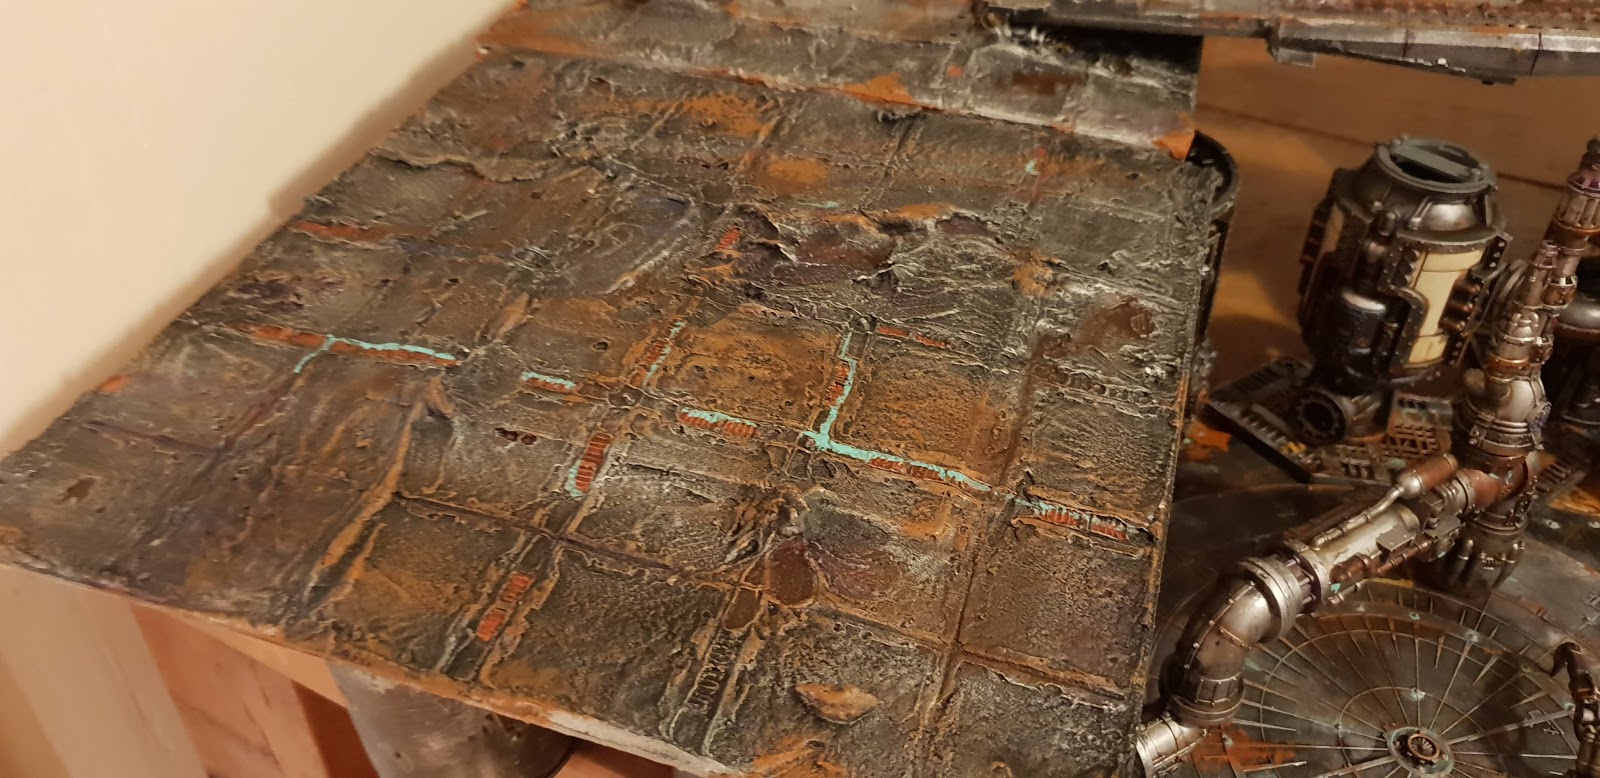
 As I wanted to keep this in line with the rest of my tiles I followed the same process as before, and added PVA to Polyfilla to make a rough format, and then press moulded with the tile mould I had.
Add another layer of PVA to further seal/protect and then spray.
 Paint wise I bulk dry brushed, then picked out the bronzes, then the colours, and spot colours, then any detail and then got cracking on the weathering. I went for a fair amount (and still would be tempted to do more) of rusting and streaking on these.
And the whole lot together...
Paint wise I bulk dry brushed, then picked out the bronzes, then the colours, and spot colours, then any detail and then got cracking on the weathering. I went for a fair amount (and still would be tempted to do more) of rusting and streaking on these.
And the whole lot together...
Next up I've got some scenarios I want some custom pieces for...


Great looking terrain. Very inspiring with a properly grungly, rusty paint job to compliment the terrain. Need to get some of those gravel filters.
ReplyDelete