I’ve noticed that a lot of the times, the
first time that you try out new skills and techniques, they’ll be triggered
because you want to bring the best out of the newest and shiniest models that
you own.
You’ll be happier, and more dedicated to try to learn something new to really make the
model pop. One of my most recently favourite mini is the Hades, so I figured a new process
should be attempted in full, with practice.
Techniques come with the mini, but stick
around afterwards
The first time that I tried out sponge weathering was on a Rhino, now used
on anything with a driver.
Battle damage. Snow. Icicles. Dirty golds.
All tried out on mini’s that
was marginally newer and shinier than the others owned thus far. Many are still
to be perfected, but with time, and practice, they get better and better.
I've seen a lot of things on really
helpful sites that indicate Salt weathering as a good mechanism to get a really
effective and realistic rusted effect on vehicles. http://massivevoodoo.blogspot.co.uk/ is
one of the best resources I've come across, some brilliant articles that go
from the top of the learning spectrum all the way to the basics, without
patronising or assuming you’ll own all the kit and their tutorial on salt
weathering is one I can recommend. It advocates an airbrush but does include
some instructions for without.
Not wanting to ruin my Hades (as Salt is
fairly well known for being aggressive) I trialled a few options on the bases
of some of my Imperial guard tanks. First you whack down a colour. This I painted
with a brush, I decided to try out a few different rust-like colours to see
which would be most effective.
After this, you spray a layer of hairspray
down onto the dried paint and sprinkle salt onto the still-wet spray. This was
where I tried a few more options.
I tried a combination of the salts I had
available, to see which would bring the most effective look. After the salt had
dried for several hours I then tried two options. With 2 tanks I sprayed them
with Citadel Chaos black. And with the others I painted over.
This was where you’ll see how tough hairspray
compares. When painting, even as lightly as possible, the salt grains would
still lift clear and move away from where they were based. When spraying, they
managed to keep their original placing far better. Leave to dry once more.
Then onto the hot water. Old, brush check.
Hot water check. This process was a lot easier than I had initially thought, and
the grains lifted far easier than I’d thought.
This stage revealed that colour choice was
important. The greens and the blues looked the worst as rust. I thought an interesting
patina would be cool, but in practice, the blues needed to pop far more, and
likely would work better with brown as well.
These examples also weren't helped by the
shape of the large grain salt looking the least realistic.
Spray paint worked fine, too well in fact.
The rust afterwards looked far too clean. The irregular patina and brush strokes of the layer of paint over it looked far better.
So, before it had dried, this was my
favourite result of the rust that I had.
- Brown Rust.
- Little salt.
- Raised areas of 'rust' texture.
- Small grains.
- Rust layer hand painted.
- Base layer hand painted.
And then the stuff dried...
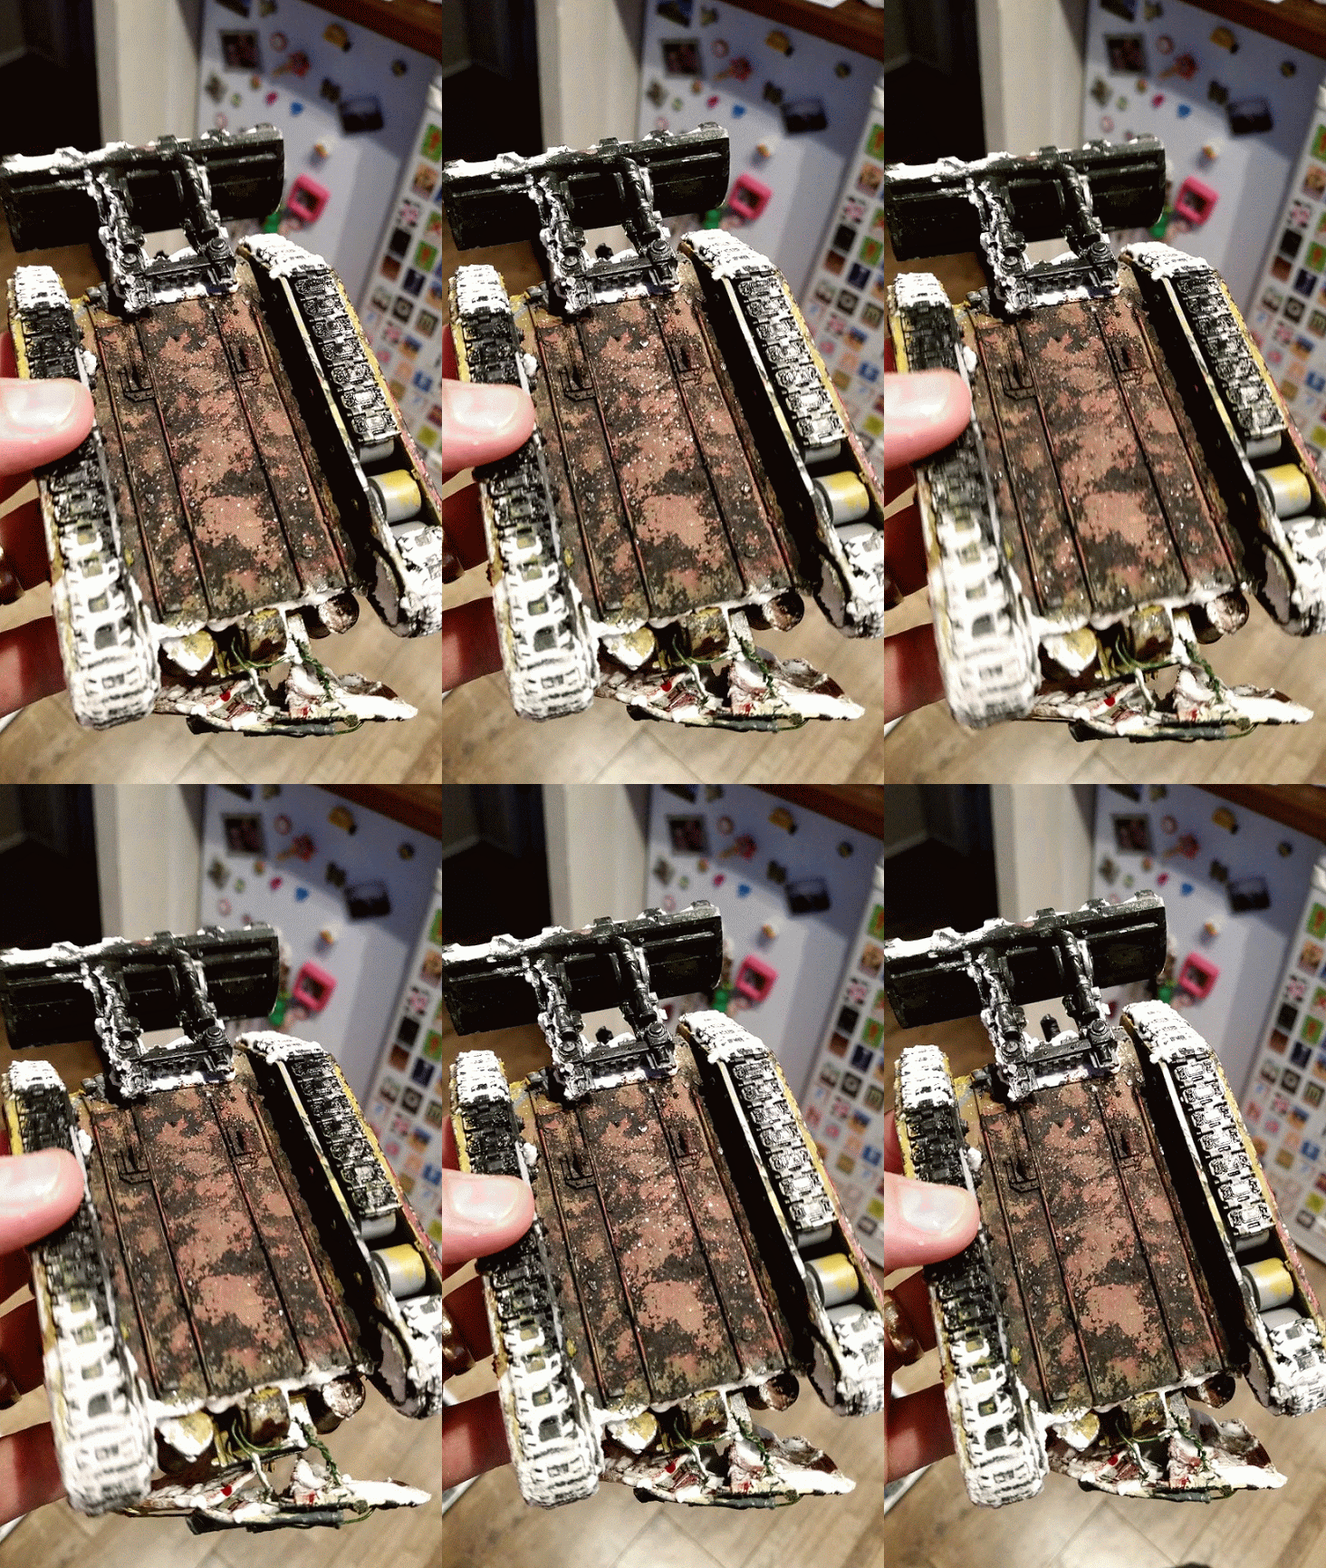
And the base of
my tank turned into the pussy-vampire of the Twilight films.
SPARKLE!
And the still image.
This was an unfortunate example of where some of the grains have remained adhered, so with a little more vigorous brushwork and some almost boiling water the hull looked more like the following.
And best of all no shimmer
At the same time, I
am wondering whether the better method may be to simply try a Rust base, a
layer of hairspray and then the base coat over its surface. As random movements
of the brush and sensible rust patterning should be as effective, minus the
salt-hassle.
I also noted that this was easy enough to achieve whilst the surface is flat, the key would be to get the direction correct.
I have three more tanks with which to
practice this process upon, so by the third, this should be perfected/completed!
To be continued...


The main benefit of the salt method is the "Random" effect you'd get. It would work best for a type of tank that would be left outside to slowly decay over time. (orks!) Less so a tank that was rusting due to lack of maintenance during wartime. (That would be more targeted brush work).
ReplyDeleteThat being said, the overall effect in the bottom two images is really awesome. Reminds me of the hull of an old ship.
Your gifs have also inspired me to do something similar with finished models! Thanks!
Post it here when you've finished! I need all the examples I can get.
DeleteThe idea with this is to do the hades like the whole thing is a hunk of rusted metal.
Will do! But my idea wasn't so much a salt method (which I haven't even really attempted yet, though currently painting a mega dread I should have tried it on...), but to get a rotating pilith and record video of finished models on a turntable as a gif for the finished posts!
Delete